Back to Blog



Featured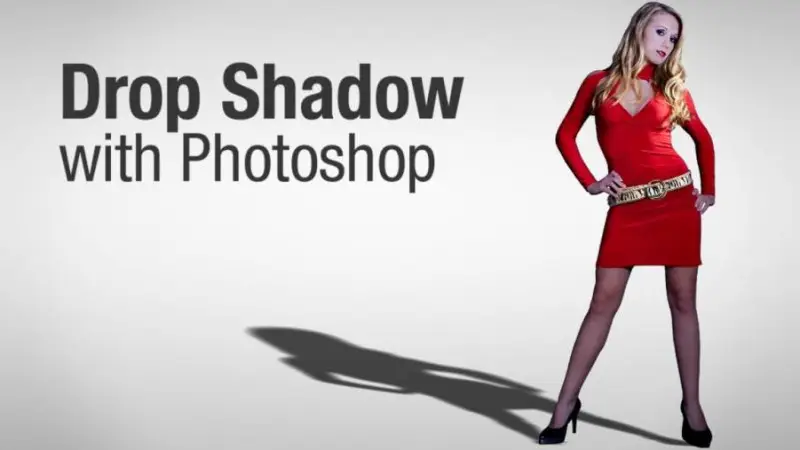
How to Add a Realistic Drop Shadow in Photoshop (Step-by-Step Guide)
September 8, 2025How to Add a Realistic Drop Shadow Effect in Photoshop
Author: Md Forhad Hossen
When you browse product images on an eCommerce website, you’ll notice something interesting — most professional product photos include natural-looking shadows.
These shadows make the product appear grounded, realistic, and visually appealing.
Without shadows, objects often look like they are floating in space, which feels unnatural to customers.
As a designer who works every day in product photo editing and commercial image design, I often add shadow effects to product images. One of the most widely used techniques is the drop shadow effect.
In this guide, I’ll show you how to create a realistic drop shadow in Photoshop step by step so your product images look more professional.
What Is a Drop Shadow in Photoshop?
A drop shadow is a visual effect that creates a shadow behind an object to simulate light falling on it.
This effect is commonly used in:
- Product photography
- eCommerce websites
- Advertising designs
- Magazines
- Catalogs
Professional editing tools like Adobe Photoshop allow designers to create realistic shadows that give depth to an object.
The purpose of a drop shadow is simple:
It makes the product look more natural and three-dimensional.
Why Drop Shadows Are Important for Product Images
Drop shadows are extremely important in eCommerce product photography.
Online stores rely heavily on visual presentation to attract customers.
Marketplaces such as Amazon, eBay, and Shopify often feature product images with realistic shadows because they improve the overall appearance.
Benefits of using drop shadows include:
- Adds depth and realism
- Makes products look grounded
- Improves product presentation
- Enhances visual quality
- Increases customer engagement
From my personal experience editing product photos, adding a subtle shadow can completely transform a flat image into a professional commercial visual.
Before Creating a Drop Shadow
Before adding a drop shadow, make sure your product image already has the background removed.
Professional editors usually remove the background using techniques like:
- clipping path
- photo masking
- background removal
Once the product is isolated, it becomes easier to create a clean and realistic shadow.

Step-by-Step Tutorial: Creating a Realistic Drop Shadow in Photoshop
Below is a practical workflow used by professional designers.
Step 1: Open the Image in Photoshop
Start by opening your product image in Adobe Photoshop.
Make sure the object is placed on a separate layer with a transparent background.
Step 2: Duplicate the Product Layer
Select the product layer and duplicate it.
You can do this by pressing:
Ctrl + J
This creates a copy of the product that will be used to generate the shadow.
Step 3: Fill the Layer with Black
Change the foreground color to black, then fill the duplicated layer.
This converts the copied object into a solid black silhouette, which will become the shadow.
Step 4: Transform the Shadow Shape
Press:
Ctrl + T
to activate Free Transform.
Now stretch the black shape downward slightly to simulate the direction of light.
This step creates the base shadow shape.
Step 5: Position the Shadow
Move the shadow layer below the original product layer in the layer panel.
This ensures the product appears on top while the shadow sits underneath.
Step 6: Apply Motion Blur
To soften the shadow edges, apply Motion Blur.
Go to:
Filter → Blur → Motion Blur
Set the angle to 0° and adjust the distance until the shadow appears smooth.
Step 7: Apply Gaussian Blur
Next, soften the shadow further using Gaussian Blur.
Go to:
Filter → Blur → Gaussian Blur
Set the radius around 3 pixels to make the shadow look more natural.
Step 8: Add a Layer Mask
Add a Layer Mask to the shadow layer.
This allows you to control which parts of the shadow remain visible.
Step 9: Use the Brush Tool
Select the Brush Tool and lower the opacity to about 30%.
Use a soft brush to gently fade parts of the shadow so it looks natural.
This step helps simulate real lighting conditions.
Step 10: Adjust the Shadow Position
Finally, use the Move Tool to adjust the shadow position.
Make sure the shadow aligns with the light direction and product perspective.
A well-placed shadow should look subtle and realistic.
Types of Shadows Used in Product Photo Editing
Professional image editors often use several shadow techniques.
Natural Shadow
Maintains the original shadow from the photoshoot.
Drop Shadow
Creates a soft shadow behind the object.
Reflection Shadow
Adds a mirror-like reflection beneath the object.
Floating Shadow
Creates a modern floating effect used in advertising.
Each shadow style serves different design purposes depending on the product and marketing needs.
Why Professional Shadow Editing Matters
Even though Photoshop offers automated shadow effects, professional designers rarely rely only on default settings.
Instead, they manually adjust:
- Shadow angle
- Opacity
- Blur intensity
- Light direction
These small adjustments make the shadow look more realistic and visually balanced.
In professional product photo editing, shadows play a key role in creating high-quality commercial visuals.
These techniques together help create professional eCommerce product images.
FAQ – Drop Shadow in Photoshop
What is a drop shadow in Photoshop?
A drop shadow is a visual effect that creates a shadow behind an object to simulate depth and realistic lighting.
Why are drop shadows used in product images?
Drop shadows make products look more natural and professional by adding depth and grounding the object visually.
Can drop shadows increase eCommerce conversions?
Yes. Realistic product images with natural shadows improve visual appeal and can increase customer trust and engagement.
Is manual shadow creation better than automatic effects?
Yes. Manually created shadows allow designers to control light direction, softness, and placement for more realistic results.
Adding a realistic drop shadow in Photoshop is a simple but powerful technique that can significantly improve the quality of product images.
In the world of e-commerce and digital marketing, even small visual improvements can make a big difference.
As someone who works daily in professional photo editing and graphic design, I always recommend using natural shadows to make product images look more realistic, professional, and appealing to customers.
If your goal is to create high-quality commercial visuals, mastering shadow effects is an essential skill.
Recent Posts
Jul 13, 2026
Multi Clipping Path Services for Color Correction and Retouching
Jul 13, 2026
Professional Retouching Services in Dubai vs Basic Photo Editing: What’s the Difference?
Jul 12, 2026
Headshot AI Prompts That Actually Work: Examples for Clean Business Photos
Jul 8, 2026
What Is Product Photography? A Complete Beginner’s Guide
Jul 7, 2026
Best Clipping Path Service Providers: How to Choose the Right One


Fast, Flawless, and Affordable
Ready to Get Pixel-Perfect Results?
Tired of slow, sloppy edits? Upload your first 5 images for free and see the quality firsthand. No commitment, no credit card required.
Free trial — no card needed
4.9 / 5 rating from 500+ reviews
How it works
- 1
Upload your images
Send 5 photos for free
- 2
We edit them
Expert editors deliver in 24hrs
- 3
Review & approve
Love the quality, order more
Avg. turnaround12 - 24 Hours